World first: C# kernel running on MIPS

Exciting news today as we announce our working kernel for MIPS based on the Creator CI20 board.

To the best of our knowledge, this is the first time in the world that anyone has got a C# kernel or operating system (of any form) working on a MIPS processor.

How did we do it?

We started the week by setting up the environment in which we were able to send a kernel binary file to the CI20. To see how this setup process is done, please read Ed’s post published earlier this week. After the connections were established we started to implement the necessary IL operations for the MIPS architecture to get the test kernel working.

The conversion of IL implementations from x86 to MIPS has been relatively smooth, except for the fact that in the MIPS architecture data stored in the memory must be half- or full-word aligned. This caused some initial headaches, however, Ed was determined to get to the bottom of the issue and in little time the problem was solved.

Other differences that required a lot of study and thought were related to the assembly code syntax for MIPS (GNU assembler – GAS) and the instructions available (reduced instruction set for MIPS). Although MIPS is a RISC architecture, meaning that more instructions must be used to perform the equivalent computation compared to x86, there are 16 general purpose registers available (as opposed to 4 on the x86) which makes implementation much easier. Furthermore, the programmer can also make use of pseudo-instructions which speed up implementation.

What does it do?

So what does the test kernel actually do? The answer is both not that much and quite a lot.

Although the functionality of the kernel is limited to changing the colour of the on-board LED and reading/writing characters from/to the UART ports, the fact that the kernel does that much proves that the FlingOS compiler is in a stable and solid state. It is a great proof of concept and initial step from which the new MIPS kernel can progress.

This has been a very exciting week and we are looking forward to completing the target architecture library and expanding the test kernel. In a few weeks time we will have a fully functioning IL compiler for MIPS.

Can I try it?

We’ll be releasing a compiler package and stable copy of the test kernel in the next month. We’d like to expand our compiler and proof-of-concept, test kernel a bit before releasing it to the wild.

Keep an eye on this space! Please ask questions below.

Ed and Roland

Stage 2 : Boot a custom OS

Earlier this week I tweeted that “Stage1: Boot a different OS – complete” meaning that I had successfully booted an alternative OS on the Creator CI20s (which were kindly provided by our sponsor Imagination Technologies®. Well, today I succeeded in booting a very basic custom operating system on the CI20s, so here’s how I did it.

For starters, I downloaded and installed the current compiler toolchain for Windows – Sourcey Codebench for MIPS available here. I installed mine to a non-standard directory but it works just fine. We’ll come on to how to use it later.

I also downloaded and install Putty and Serva – both of which are necessary tools. Putty provides a console interface to the serial connection required to talk to the CI20’s U-Boot bootloader. Serva provides an easy way to set up a TFTP server on Windows. Both of these tools are free. Again, we’ll come on to how to use them later.

Lastly, I had to buy one small (cheap) bit of extra hardware – a USB to UART converter. Be aware that there are two chips widely used to produce these devices. One of them only supports Linux and version of Windows 7 and earlier. The other chip supports Linux and all current versions of Windows – so make sure you get the right one! I bought one for Windows 8.1 (i.e. the second type of chip) from Amazon (with one day delivery on a Sunday no less!). I ordered from 3C4u who use Amazon. (The first time I tried to order two of these the package never arrived. I re-ordered and they were delivered fine. Amazon gave me a refund and Prime subscription extension for the first order so I’m not complaining too much!)

For the custom OS I wanted to try out something which I knew worked. So I went online and found Lardcave.net’s great series of tutorials on writing a custom CI20 OS. I cloned the Git repo and started following the instructions. For the USB to TTL chip I have, the tutorial is correct, you need to connect RXD on the converter to TXD on the CI20, and visa-versa for TXD on the converter and RXD on the CI20. To avoid having to use the power cable, you can also attach the 5V pin to abny of the CI20’s 5V_IN pins on the primary expansion header. The board will power on as soon as you connect the 5V pin so hold off until later for that! You’ll also need to connect an Ethernet cable to the same hub or switch your PC/laptop/WiFi hub is connected to – this will be so the CI20 can connect to the TFTP server.

After cloning the Git repo I ran across a few issues. The Lardcave.net tutorials were written for Max/Linux and for if you compile GCC yourself. Since I installed Sourcery CodeBench , the Makefile was not set up to compile properly. I eventually worked out how to it so it works properly. Here is a copy of my make file:

AS=mips-linux-gnu-as -mips32
CC=mips-linux-gnu-gcc
LD=mips-linux-gnu-ld
OBJCOPY=mips-linux-gnu-objcopy
CFLAGS=-Os

OBJS=start.o main.o

hello.bin: hello.elf
 $(OBJCOPY) -O binary $< $@

hello.elf: $(OBJS)
 $(LD) -EL -T linker.lds -o $@ $+

%.o: %.[Sc]
 $(CC) $(CFLAGS) -EL -c -o $@ $<

clean:
 rm -f *.o *.elf *.bin

I combined this with a simple batch script called build.bat in the same directory as the Makefile which allows me to specify the path to Sourcery CodeBench’s bin folder, instead of other version of GCC which I have installed. The batch script looked like this:

@echo off
SET BD=C:\Users\Ed\Documents\Coding\C\2015\MIPS\Compiler\bin
%BD%\cs-make
pause
@echo on

Where BD is set to the path to Sourcery CodeBench’s “bin” folder.

Having compiled the “hello.bin” file I proceeded to set up Putty and the TFTP server. Here are a series of images I took showing the process. By the time I was done entering the commands into Putty (also shown below), the CI20 showed the nice, purple LED as expected.

2015-08-02 - Putty Config
Putty configuration

For the Putty configuration shown above, remember to update the COM port name to the name of the COM port device on your computer. This can be found by opening Device Manager and looking under the Ports node of the tree.

Serva config
Serva config

For the Serva configuration shown above, remember to update the “TFTP Server root directory” to the same folder as your “hello.bin” file is in.

2015-08-02 - Putty Console
Putty console

For the commands to U-Boot, remember to replace the serverip “192.168.0.6” and the ipaddr “192.168.0.20” with values for your network. The IP should be the IP address of the computer which is running Serva (which can be looked up by doing “ipconfig /all” in a Windows command prompt on the server computer). The “ipaddr” can be any value you like but the first three parts must match the IP address of your server.

2015-08-02 - Serva Log
Serva log

If the boot completes successfully, you should see a Serva log similar to the one above. The LED on the CI20 should turn purple as shown below.

Final result
Final result

Poor Design: A subjective statement

60 lines of code changed. 100 times faster.

By changing just 50 lines of code, I was able to make FlingOS™ read files from a FAT file system 64 times faster. Add just ten more lines and reading files from FAT on a USB stick is up to 100 times faster. But how can such small changes lead to such a large increase?

Progression: From good design to better design

The simple answer is: poor design. FlingOS is designed to be easy to understand both in terms of reading the code and in terms of overall structure and control flows. Unfortunately, this can lead to massive inefficiencies. FAT file systems, USB Mass Storage devices and EHCI Controllers are by no means simple, so writing clean code is difficult. Furthermore, writing code you can just jump-into without knowing the rest of the system is even harder. But that is what I have attempted with FlingOS (and hopefully achieved). So how can I call my original code both a poor design and a good design?

When I was first writing the code for USB Mass Storage devices, I decided that reading one sector was easier than multiple sectors. So I implemented the basic code for reading a single sector and that was that. Originally, therefore, the design was very good for simplicity and readability – the key things which make code understandable. But from a performance view it was highly inefficient (for both hardware and software). From one perspective my original design was good and from the other it was poor.

As the features of FlingOS have expanded (conforming to standards along the way), the underlying USB code has become capable of reading multiple sectors in a single request. The USB code has grown somewhat in complexity (by necessity) but remains understandable. With the new capability of reading multiple sectors all at once, suddenly my original design looks poor from both perspectives. Because reading one sector at a time makes no sense if you can just as easily read many at once. This reduces how easy the USB Mass Storage code is to understand because it adds a layer of confusion. As a result, it has become necessary to updater the USB MSD driver code.

But what about reading files from FAT? For that, FlingOS uses the FATFileStream class. Again, this is a story of progression. It started (and remained for a long time) totally simple. It just read one cluster at a time till it had read all the data that was requested. This was largely because reading multiple sectors at a time wasn’t supported by the underlying device drivers, so it was pointless to request more than one cluster at a time. But since the underlying device drivers (the USB Mass Storage driver, PATA driver and PATAPI driver) all now supported multiple-sector reads, why not? In fact, you can increase read speed by requesting as many contiguous clusters as possible. The algorithm for doing so is actually just as easy to understand as reading one sector at a time.

Today, therefore, I finally implemented the USB MSD multiple sector read and FAT File Stream multiple cluster read. It changed just 60 lines of code to utilise the new, underlying features. The result? Up to 64 (contiguous) clusters can be read at once and there’s no specific software cap on number of sectors to read at once. The overall effect of which is the code runs around 100 times faster (over small files. Possibly even faster for large ones due to other factors). This makes drivers loaded from a USB stick much more viable (which is what FlingOS is currently working towards).

Judging a design

So I’d like to leave you with this:

Calling code “bad” or “good” are highly subjective judgements.

You may call one piece of code very poor. Someone else may say it’s the best in the world. It all depends on how you’re judging it – be that by performance, readability, memory efficiency (which itself has many factors), lines-of-code used (ugh…) or any other measurement you care to make. All code will compromise (or excel) at something; you just have to work out what. When you’re judging someone’s code (even your own), remember to state what factors you took into consideration. What was your perspective.

The bug that went undetected for over a year…

Yesterday I announced that:

Just fixed a bug which has existed since the first week that I wrote FlingOS – so excited!!

I promised a blog post would follow, so here is that blog post – it’s going to be a good one. So sit back, relax and read on as I take you through the history of this bug.

When I first started writing FlingOS I had somewhere between no idea and less than no idea what I was doing. Seriously, all I knew was the structure of a C# to native compiler – I had worked on Cosmos for about 5 months but for various reasons I decided I wanted to write my own C# OS, with a different structure. I had my own compiler working relatively quickly and the next step was to implement basic features that would underpin the entire OS.

It’s probably reasonable to say that if something is going to underpin your entire system, you want to get it right, lest it have any nasty, invisible side effects later on. One such underpinning component was the Heap. Ahh the Heap… The heap implementation has caused much confusion and difficulty. This is not because a heap is difficult to understand or use, it’s just fiddly and crops up all over the place such that slight errors kill the entire OS. Some such errors have included not using spin locks (after I introduced multi-threading a few months back) and not allocating the heap enough space. (The heap space use to be allocated in the .TEXT section of the code! 120MiB .ISO files ;D With the new drivers compiler I shifted it to .BSS where it should be.)

When I first looked at implementing a heap, I wasn’t too interested in the internal workings. I knew what a heap did, I knew there were lots of ways of implementing them, each with pros and cons. I just wanted something simple and easy that I could use. Of course, FlingOS being one of only three active C# operating systems worldwide, there aren’t many (if any) suitable heap implementations floating around. However, there are lots of samples in C. The one I lumped for was a simple one from OSDev.

Over time I have adapted and updated the implementation to add things like allocation on or avoiding a boundary (as required by USB). The main Alloc function, however, has remained the same. Entirely the same. And this is where the issue lies. Early on in my development I found that with a 10MiB heap, my OS regularly seemed to run out of allocatable memory resulting in seemingly random page faults. My somewhat ignorant solution at the time was? : Make the heap 100MiB! This seemed to fix the problem, even though 90% of the heap was never allocated.

As time has gone on, page faults have appeared and disappeared sporadically until recently when I started trying to read large files from USB sticks. This used a lot of heap memory and suddenly the page faults were happening all the time. Not having really had to deal with page faults before I had no idea what was causing it. My instinct said that a page fault is due to unmapped memory, so something must be allocating an invalid pointer. But the heap wasn’t anywhere near out of memory. Unfortunately, with so many compiler changes going on in the past few months, there was no consistency to the issue. Even in the past few days the faulting address (or even instruction address) was not reproducible. It was seemingly random.

I investigated everything from interrupts to memory leaks to who knows what trying to trace this. Eventually I realised I wasn’t going to be able to unless I had a better view of two things:

  1. The sequence of events which lead to the page fault (and subsequent crash)
  2. The layout of all memory so I could see where things might be going wrong

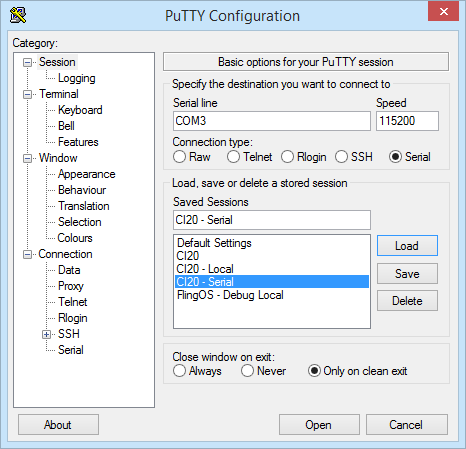
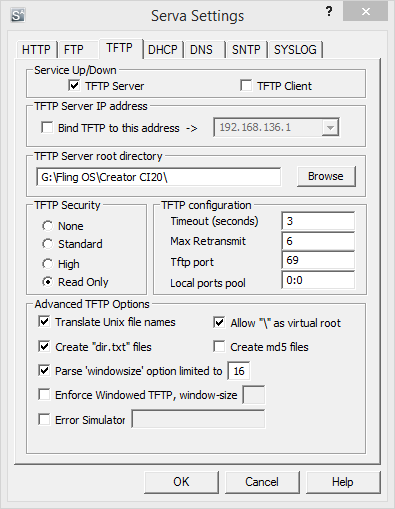
For point (1) I had previously just outputted stuff to the screen through FlingOS’s BasicConsole class. But this wasn’t enough. I needed traceability and the ability to go back more than  a screen’s worth of information. So I implemented a new Serial class and hooked into the BasicConsole to redirect the output to a file on my host machine. As it turns out, I never needed to implement anything for point (2) – I realised what was going on before I got that far.

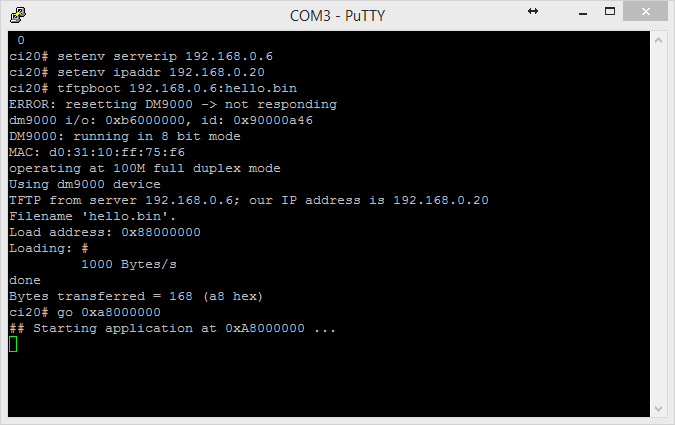
I realised the issue was to do with USB code, so I turned on all the trace code for the USB stack and inspected the output. The output contained the key piece of information : virtual and physical addresses of the memory the heap was allocating. They were invalid. They were valid addresses, but they didn’t fit inside the heap’s allotted block of memory! They were overrunning the end of the heap. I’d found my one, consistent piece of information.

Naturally I went looking for what could be overwritten by code writing to space beyond the end of the heap. Sure enough, immediately the heap memory were the unprotected page tables. And because USB uses physical addresses, there was no way I could have protected the page tables. I tested by allocating padding space between the page tables and the heap – sure enough the code took far longer to crash.

So the issue was in the heap. But the OSDev implementation looked pretty solid and many people had tested it. So I must’ve converted the code incorrectly to C#.  In the 18 months I’ve been doing low-level programming my understanding of pointers and pointer manipulation has grown – a lot. I went back to look at the heap in detail and found this spurious line of code:

void* result = (void*)(x * b->bsize + (UInt32*)(&b[1]));

This line of code is supposed to calculate the address of a block (x) with block size (b->bsize) and offset from the start of the heap (&b[1]). For those who understand pointer arithmetic they will easily see my mistake from when I converted the code – UInt32* will result in the pointer being multiplied by 4 (because UInt32 is 4 bytes in size). In my defence, however, the original line of code was thus:

return (void*)(x * b->bsize + (uintptr)&b[1]);

I asked a number of experienced programmers what they would expect uintptr to be a type for and all but one said: pointer to a uint (i.e. UInt32*). Only one was able to give me the actual definition (as per C99, which I found online) which is:

In C99, uintptr is “an unsigned integer type with the property that any valid pointer to void can be converted to this type, then converted back to pointer to void, and the result will compare equal to the original pointer”.

Great…so uintptr is not UInt32* it is in fact just UInt32 in C#.

Here’s a few caveats for those pedantic types amongst you:

  • Yes, pointers can be 8, 16, 32 or 64-bit. So it shouldn’t be UInt32 it should be some other form of UInt that allows agnostic size. However, FlingOS is entirely a 32-bit OS and C# doesn’t have a useful equivalent for uintptr (see next point).
  • Yes, C# has an IntPtr type – but it is intended for managed pointers and doesn’t play easily with most of the low-level code I’m trying to write for FlingOS. I may start using it in future, I may not. It might need some compiler updates to support it.

Detecting ATAPI drives

In the past few days I’ve been tackling a problem I’ve had for a while now – how to make ATAPI detection and retrieving device information reliable. I found that if I confined myself to a virtual machine then the existing code was pretty stable. However, with the large range of real-hardware I now have available to me, “it works in a VM” just wasn’t satisfactory. So I started testing and researching.

What I found was that I could reliably detect CD / DVD drives on all hardware. However, almost completely consistently, issuing the Device Identify Packet command resulted in the error bit being set. Yet my code worked exactly the same as many other people’s online examples. I reached the following conclusions:

  1. My code wasn’t doing something properly. It must be missing a step that would allow the ATAPI disc to respond properly.
  2. Other people’s code clearly hadn’t been tested on real hardware. There were various other indications of this which I won’t go into detail about here.

What I realised, however, was that once an ATA device has reported an error, it does not clear the error flag until you send it a new command. I also noted that part of the process of detecting an ATAPI disc, involves issuing the Identify command and then checking various registers to look for the PATAPI/SATA/SATAPI signatures. You check for the signatures even if the device reports an error.

So what was happening was some devices flagged up an error for the Identify command and some didn’t. The ones which did, required an additional command to be sent prior to the Identify Device Packet command otherwise it would still report an error. I went looking for a reset command and found one. Technically it only affects PATA/SATA not PATAPI/SATAPI devices. However, because it reset everything on the bus, and ATAPI devices have to be ATA responsive, ATAPI devices count this as a command. Thus issuing the Reset command clears the error flag. The problem was solved 🙂

Head over to this file on my dev branch in FlingOS’s BitBucket repository for sample Reset method code and usage.

Apply now for a sneak-preview of the tutorials…

The tutorial scripts are written and the resources are coming along nicely! FlingOS is about to enter the recording stage for its upcoming tutorial video series but if you’re excited to learn OS dev today, you can apply for a sneak-preview of the scripts! All we ask in return is that you provide some useful feedback on style, content coverage and perhaps the odd grammatical error too. Apply today by commenting below or emailing flingos@outlook.com or post on our Facebook page.

Easy PXE Network boot

I had been meaning to set up a network boot system for FlingOS for a while. Yesterday I finally got around to it and after several hours of trying different software and solutions, I finally found one which worked nicely.

I had been meaning to set up a network boot system for FlingOS for a while. Yesterday I finally got around to it and after several hours of trying different software and solutions, I finally found one which worked nicely.

There is a modest selection of software out there which will let you set up PXE Network booting. The majority of it focuses around Windows installation and updating. What I needed was a system that would allow me to switch on any network-connected laptop and have it boot the latest version of FlingOS that I just compiled on my PC or main laptop. FlingOS already uses Syslinux as its bootloader so it made sense to use the Pxelinux variant of Syslinux. Unfortunately, Pxelinux requires something that most PXE Server programs don’t support – something called the tsize command.

PXE relies on a combination of DHCP, Binl and TFTP to allow a PC to detect the availability of a PXE server and to retrieve the boot image(s). Pxelinux requires that the TFTP server supports the unusual tsize command. “tsize” allows Pxelinux to request the size of a file ahead of time i.e. before it starts to retrieve it.

After various attempts using Serva and other software, I came across TinyPXE. Finally something that would work. TinyPXE was written by a guy who needed a simple, effective, no-install solution to running a PXE server. Perfect. It even comes with support for Pxelinux, Grub and others. What’s even better, is that it can auto-load everything from a human-readable config file. So once you’ve worked out what setup you need, you can just put it in the config file and never have to worry after that.

Here’s a copy of the contents of my config file (config.ini):

[arch]
;will over rule the bootp filename or opt67 if the client arch matches one of the below
00006=bootia32.efi
00007=bootx64.efi
[dhcp]
;needed to tell TFTPd where is the root folder
root=G:\Fling OS\Fling OS\Kernel\Kernel\bin\Debug\DriversCompiler\ISO
;bootp filename as in http://tools.ietf.org/html/rfc951
;filename=ipxe-undionly.kpxe
filename=pxelinux.0
;alternative bootp filename if request comes from ipxe or gpxe
; altfilename=menu.ipxe
;start HTTPd
httpd=0
binl=1
start=1
dnsd=0
proxydhcp=1
;default=1
bind=0
;tftpd=1 by default
;will share (netbios) the root folder as PXE
smb=0
;will log to log.txt
log=0
opt1=255.255.255.0
opt3=192.168.43.1
opt6=192.168.43.1
opt28=192.168.43.255
;opt15=
;opt17=
;opt43=
;opt51=
opt54=192.168.43.120
;opt67=
;opt66=
;opt252=
poolstart=192.168.43.121
poolsize=20
;alternative bootp filename if request comes thru proxydhcp (udp:4011)
;proxybootfilename=
;any extra dhcp options
;my gpxe / ipxe dhcp options
optextra=175.6.1.1.1.8.1.1
;the below will be executed when clicking on the online button
;cmd=_test.bat
;if log=1, will log to log.txt
log=1
[frmDHCPServer]
top=441
left=258

MIPS / CI20 Custom OS

Want to write your own OS for Imagination Technologies® CI20? Or just want to investigate making a custom OS for MIPS? I’ve found a blog that has some great, practical content: Lardcave.net’s CI20 Bare-metal articles

The articles are written for people using Mac OSX but there’s sufficient information, when combined with the CI20 Wiki, for Linux and Windows users to get the project working. It also helpfully includes links to eBay for USB to Serial boards connecting wires.

Will we ever see FlingOS running on the CI20? Maybe but not for a little while yet. If anyone fancies having a go at porting FlingOS, by all means head over to the Join page!