
With the summer fast approaching, Fling OS needed some serious planning. Not just planning out ideas in a spider diagram and doodles on a napkin but proper planning. For this I searched around for project management and planning software and discovered I could get Microsoft Project free through Dreamspark with the University of Bristol. So I settled for it and the results are pretty good.
What on earth is MS Project?
MS Project is project management software from Microsoft. Here’s what Microsoft have to say about it:
Make project management easy and collaborate from virtually anywhere with the right tools for project managers, project teams and decision makers.
Click on the video to play. If it says “try again later”, try clicking again and waiting a second.
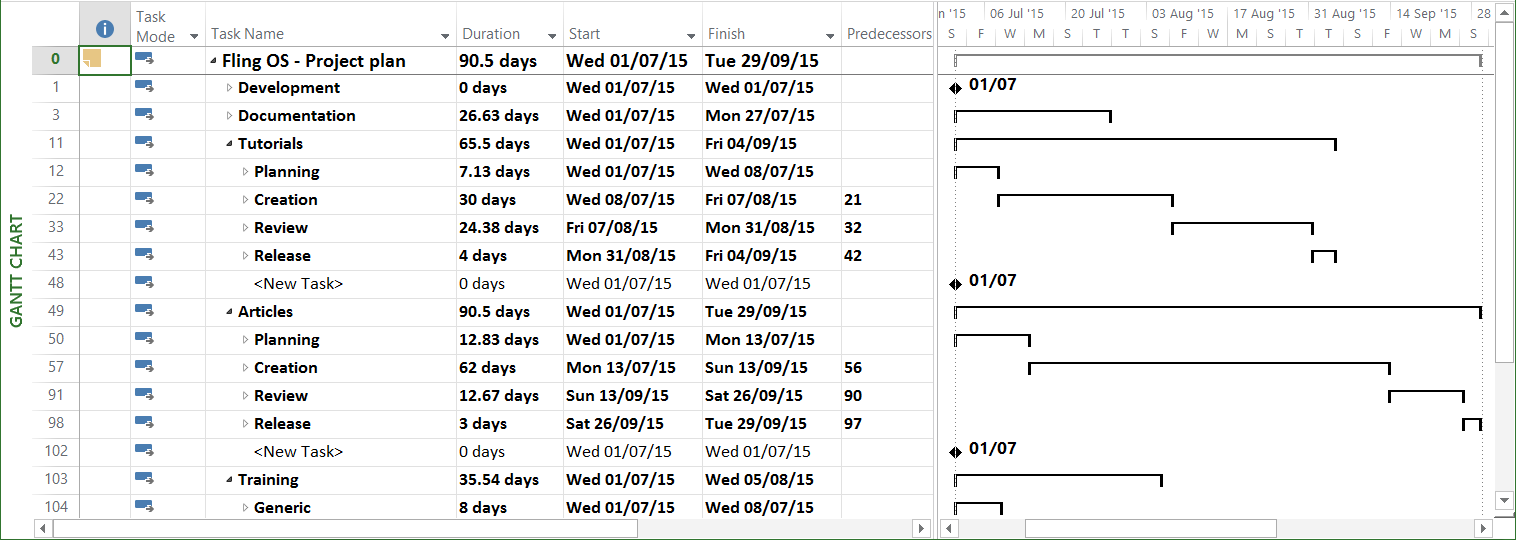
From my perspective, it was just what I needed to produce a gantt chart for planning out my time this summer. It allowed me to easily create tasks in categories and subcategories and link dependent items. The overall result is a complete graph from overview to full breakdown of my time this summer and which tasks need to overlap.
My Experience
When I first started MS Project it was daunting. Like all Microsoft software, it’s a big package full of plenty of things I’ve never heard of. The selection of templates is great, in that it’s vast but terrible, because it’s impossible to decide which one is best for your situation.Eventually I plumped for one simply called “Project management plan”.
When you first open the template it comes pre-filled with lots of empty tasks and standard project management stuff but crucially for me it started everything pre-configured for creating a gantt chart. I removed all the existing content as it didn’t match my requirements at all. This was frustrating, however, as the delete button doesn’t do what you expect. It only delete the content of the cell which you are highlighting not the complete row. This is essentially the same as Excel but makes adding/deleting tasks a little slow. You have to right click and select “Delete task”. After pinning the ribbon down, adding tasks was much easier (just the Add task button on the right) but you have to remember to select the row below where you want the new task to end up.
Creating categories was easy – simply use the indent / outdent buttons on the ribbon to shift tasks in/out of being subtasks respectively. With Automatic scheduling turned on, parent tasks (i.e. categories) automatically update their duration, start and end times according to subtask durations. By adding links between tasks and turning on Automatic scheduling you can get tasks to follow each other on the gantt chart, with their start time calculated from earlier tasks and end date from the duration. All the buttons for doing this can be found in the Tasks tab of the ribbon menu.
I made use of one final feature. The first was changing the working hours. This can be done by going to the Project tab in the ribbon bar and clicking Change Working Time. The window you are presented with is frustrating and unintuitive at best, so I will endeavour to explain. However, please take note that changing the working hours will cause Project to automatically re-calculate any durations that you have already entered into tasks. I couldn’t find a way to stop this (though I expect one probably exists). Anyway, the window you are presented with shows you the current working hours. You can select from various templates to best match your needs or create your own template. Once you click the Create your own button you will asked to select a template to clone or start from blank. Then, you will be represented with the same window as before. This was frustrating for me as nothing seemed editable.
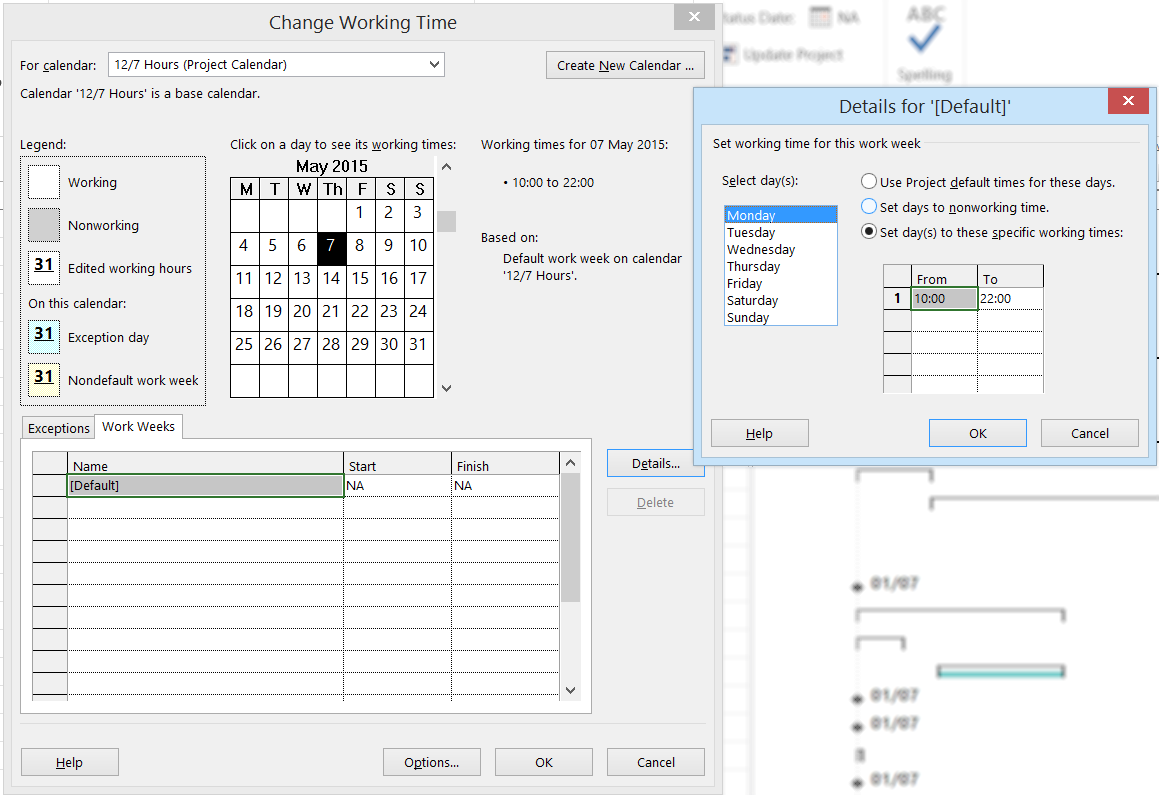
To edit the working hours and days you need to edit two things commande viagra sans ordonnance. For general options, select the correct template then click the Options button at the bottom of the window. This will allow you to edit things like the day the week starts on, number of hours per week etc. After editing this, you may also want to edit which days people will be working on. For this, select the correct template in the Change working times window and then change the tab to Work Weeks. Then select Default (or another from the list) and click the Details button. This will let you later which days of the week people work on.
The last step in updating your Project’s working hours is to select your new calendar template as the calendar for your current project. Close the Change working times window and (from the same section of the Ribbon bar) click on Project Information. In the window that appears,.select your calendar template from the Calendar drop-down on the right.
Overall
Good software, lots of potential.
While I may not have used many of the packages features and only produced relatively simply plans, I can the potential. The learning curve isn’t too steep and with a bit of research I could get to grips better with this pretty quickly. Ultimately, I’m satisfied and it did the job I needed. That said, I’m glad I didn’t have to pay for it….